Sunday 30 May 2010

Design for Application poster

For the application poster, i want to demonstrated how craft design has been used to answer commercial briefs and its popularity within the contemporary design industry.
i decided t take a shot similar to my shot which i took for my year book page, ( high birds eye, angled shot) as it was effective and relevant as it would show off my work to its full potential in context. Th majority of my work is design for promotional material, and i successful apply my design process and style in answering these.

Then on the info side to the poster i will have imagery form designers such as Chrissie Abbot showing her application of her style to music promotion and Chrissie Mcdonald in a similar way.

Samples of set shots:


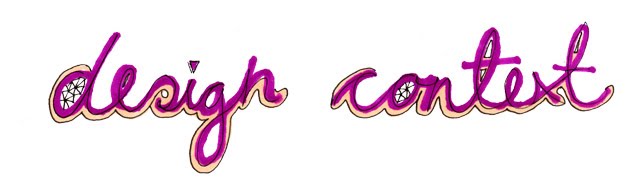
I tried to write the tittle in paper of the poster, however this was much harder than Vallee makes it look within his work. The paper folds didn't stay in paper and too much bending caused the paper to crease in the wrong way. So instead i tried using capitals instead of a swirling, joined up typeface:


This worked better but the overall effect i think actually looks a bit naff, so i decide to scar this idea.


I considered again similar to my year book shot - hand holding the cut out cardboard which would have the title written on, this would be photoshopped in for ease and time. However i have already done this, so i thought simply a nice shot would look more professional and do the set justice:


Set up of the shot:


Birds eye shot, taken standing on a stool. This was hard as i had to hold the camera at arms length to get a direct shot and took several times:


Final poster shot, simple and effective. As gives a slight illusion and conclusion to how the shot has been taken as it is only at the bottom of the poster you notice that im standing on the chair:

Refining the cover design/posters

After last shoot, i realized that why the shots where not working to there full potential was that i was positioning the set far too spread out. The reason why Vallees work is so effective and stunning is that he makes his sets on smaller scales and it is very tightly netted together.

So to refine the set i moved elements closer together here is what it started to look like:


I added  paper to the floor to fill int he space and make the set feel more colourful:


Experimenting with taking the shot at different angles, high, low and behind the set to show off the 3D elements of it. This may be good for the poster about the technical side of set design as it conveys the careful positioning and scale:


Maybe a lower angle is more effective for the poster, however this means that the poster would now have to be landscape instead of portrait. This may not be a problem but i have already designed the interviews and info pages i portrait format.

Below image which i think i will be using for the final poster for my design context. Playful and relevant as phil is physically holding up the HANDs on word:


Possibly imagery for the poster which demonstrates the technical side of set design, the number of people involves, the set itself before the image has been edited and cropped and how easily as below shows it can all go wrong in a split second if knocked over:


Friday 28 May 2010

Cover poster design

After the design for the past fount cover page which i produced, i decided to re shoot the set. i was still not happy with the arrangement within it or how the 'HANDS' letters were crafted - the letter forms needed to be refined and cut with more care and precision.


So I set out to have a whole day to make and direct the set design for the posters. this included all of the elements and whatever else i could get my hands on which would compliment the set. I firstly started to remake the word 'HANDS' out of card, but instead of using dingle cut out letters as this was time consuming when cutting out - to join the letters together to make the 3D word instead.


Here is what i started with. I first cut out the flat template for the word:


Started to add the sides to the letter forms to make the word become 3D:


I cut myself in the process:


Finished 3D word, free standing:


Making the apostrophe for the words:


Finished both words and joining elements:


I set up in studio three and arranged the paper elements which i had used in the past set mock up's for the cover designs. i just had to play around with composition and how the word would be read within the shot:


Underneath the words, 'Hands on'. i thought it was necessary to write the words 'craft' to explain to the viewer that the topic of the publication is about the application of hands on paper crafts. i trailed writing the word in different mediums, similar to the style Julian Vallee has used in many of his projects.

I was harder than it looks! To get the wires to stay positioned i had to tape them down - this ruined the loose hands free effect and it was not clear what it was meant to say. I tried using paper which was more effective, see below but still hard to get it to flow in the correct way:


Paper experiment: 


I wanted someone to be physically holding the word 'hands on' as it reflect the word, it being hand held. So i quickly mocked up and tested to see if this would work:


It did work, however i thought more was needed in the set still so i went back to experimenting with the layout again:


Using Patrick and Vo as models when i was happy with the layout. i started shooting to test what the final cover shots would look like:


Edited photo's. As the format of the cube which will hold them in square format i had to crop the photos into squares ready to be place within indesign when ready:


The above shot is my preferred shot currently, however i do not think the photographs work well in square format and need more grey space either side of the frames. There is something missing from the shots, which leaves them feeling not complete.

It was also brought to my attention that the 'D' on the word 'Hands' was not readable so i would have to re shoot or photoshop this the cut out the centre part.


After this refinement i have decided to re shoot the set for the last time. i felt this was necessary as i dont want to give this project half measures, and why stop when your almost there  - it only needs a bit more tweeting to the composition. Possibly add some paper to the floor space so there is less grey?

Saturday 22 May 2010

Mock up cube folding

Development of ideas after crit with fred, considering a change of format from juts a simple magizine layout. I decided that i wanted to produce a series of posters instead which would be contained within paper crafted triangles which could then be positioned within a set and photographed. Below are initial ideas sheet documenting my change of thought and new proposition:


However i thought it would be beneficially to create a mock up of the crafted triangles before i started to design the posters so i could see what scale to make the posters, either A3 or A2 depending on whihc would slot better inside the triangles. 

I soon found out that making the traingles was very hard on a large scale, i kept on getting the measurements out by a few mm each time and this resulting in the traingles not perfectly folding together:


After wasting a good few hours on this, i decided that this would be a hard challenge which was taking up alot of time which could be spent on the actual design of the posters instead.

However as i was making this, Phil should be a folding technique which would allow me to fold the posters up which i was making to slot together to make a cube. he said he had trailed ut this folding technique in a previously brief but hadn't put it to use of yet, so he kindly showed me how it was done and luckily it worked a treat. It needed 6 sheets, so 6 pieces of posters ot work. here is an example of how it works:


The folding involved no measuring so it suited me and was quite simple to do:


A solid paper based cube:


AS i needed six posters i had to decide on six different topic for each poster, here are the design sheets leading to my final topics:


\


Cover design sketch: